27 Stunning IKEA BESTA Hacks That Will Transform Your Home
The IKEA BESTA system offers incredible versatility at an affordable price, but sometimes you want something that doesn’t scream “mass-produced furniture.”
With a few creative modifications, you can transform these simple storage units into custom pieces that look far more expensive than they actually are.
These 27 gorgeous BESTA hacks will inspire you to think beyond the assembly instructions and create something truly unique for your home.
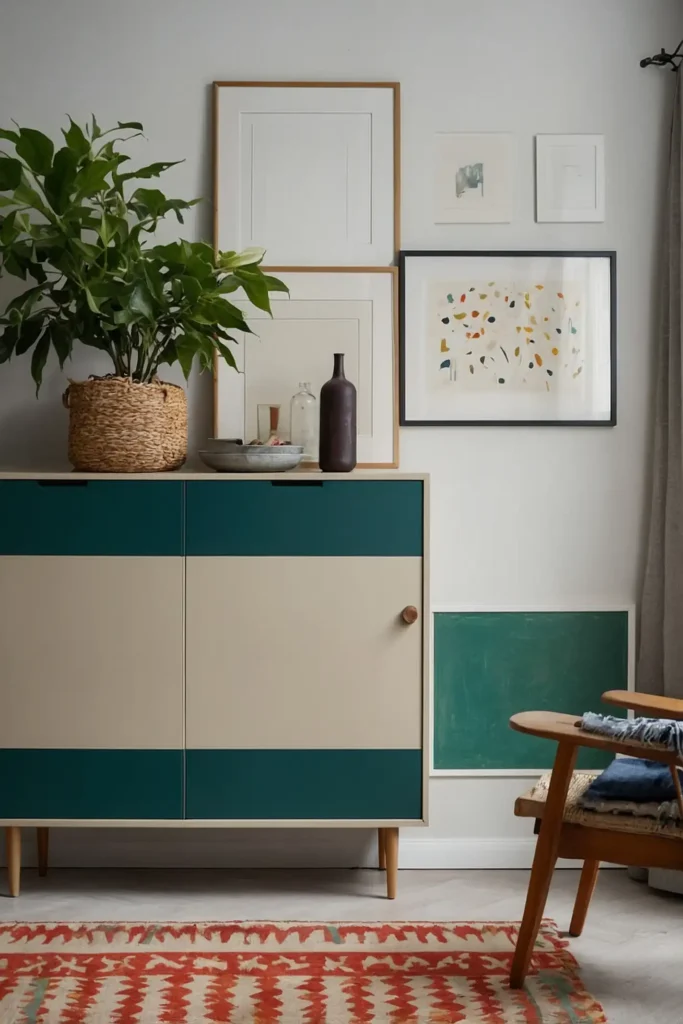
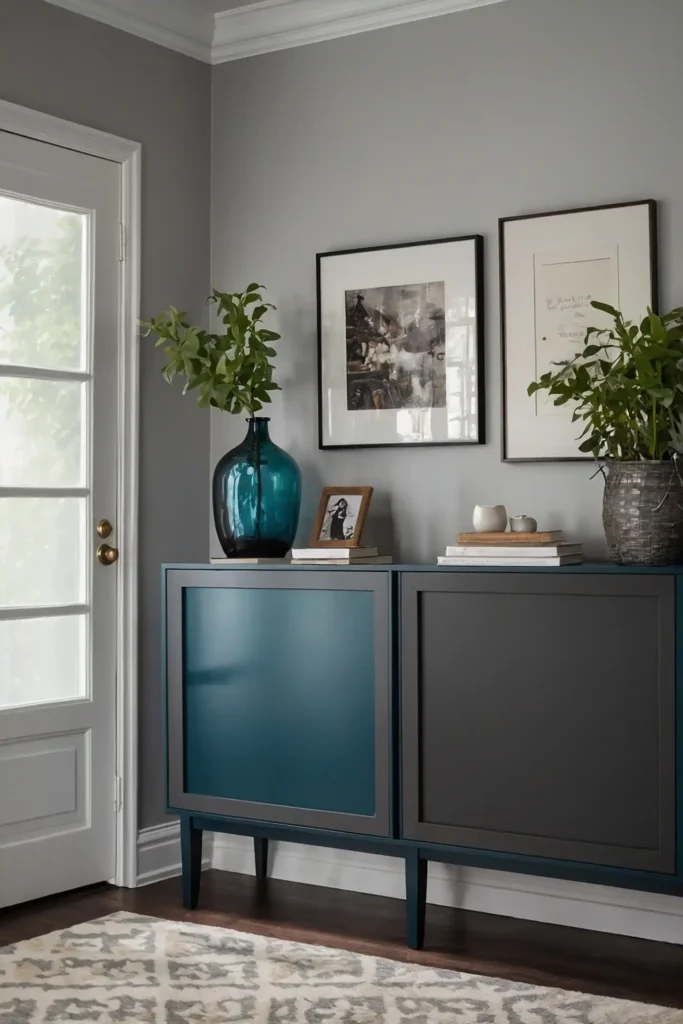
1: Mid-Century Modern Makeover
Add tapered wooden legs and replace the standard handles with brass pulls to give your BESTA unit mid-century flair.
The elevated design creates visual lightness in your space.
Paint the unit in a muted sage green or warm walnut stain to enhance the vintage aesthetic.
This simple modification transforms a basic storage piece into a statement sideboard.
2: Built-In Entertainment Wall
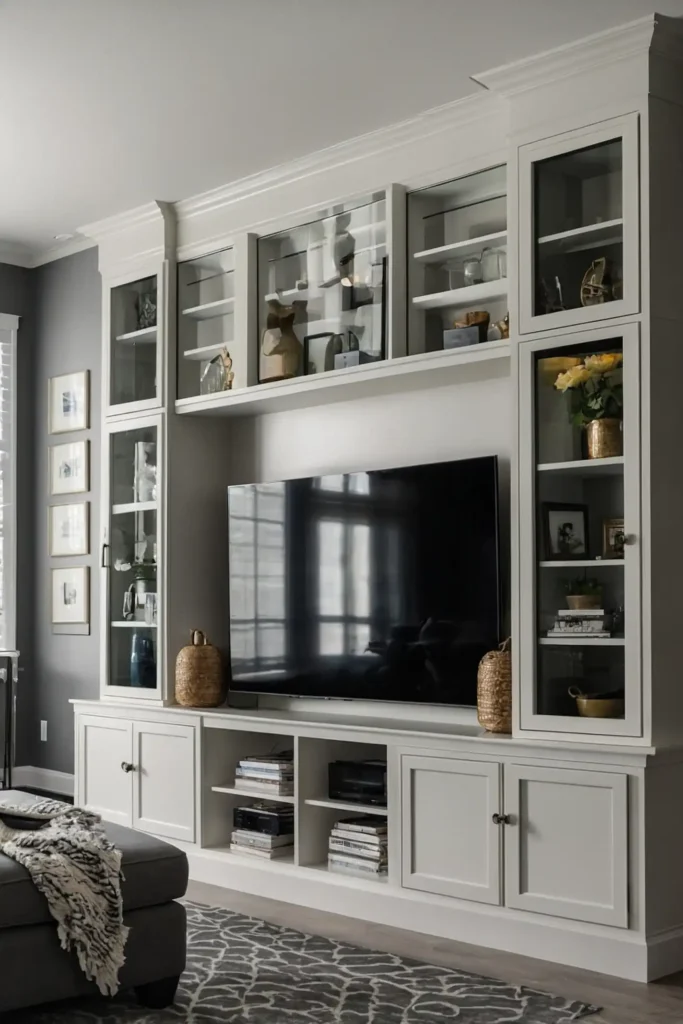
Create a custom-looking entertainment center by mounting multiple BESTA units together along a wall.
Add trim around the edges to give the appearance of built-in cabinetry.
Paint everything (including the wall behind) in the same color for a seamless look.
This hack delivers the high-end appearance of custom millwork at a fraction of the cost.
3: Luxe Marble Contact Paper
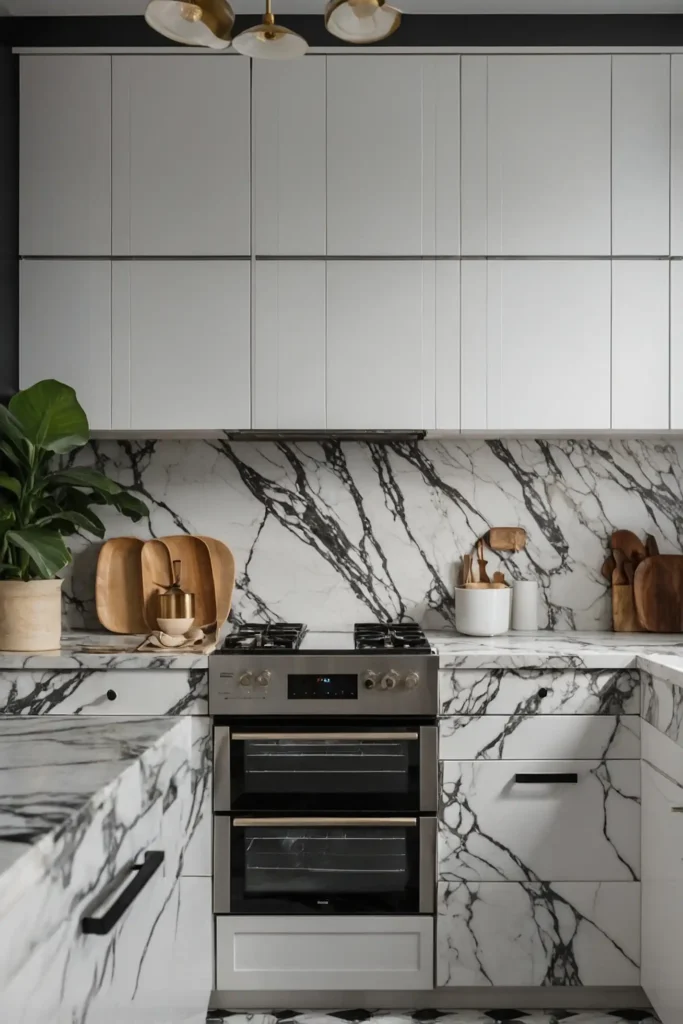
Transform your BESTA doors with high-quality marble contact paper for an upscale look.
Focus on realistic patterns with subtle veining rather than overly dramatic designs.
Apply carefully to avoid bubbles and align the pattern at seams. Pair with gold or brass hardware to complete the luxurious transformation of these basic cabinet fronts.
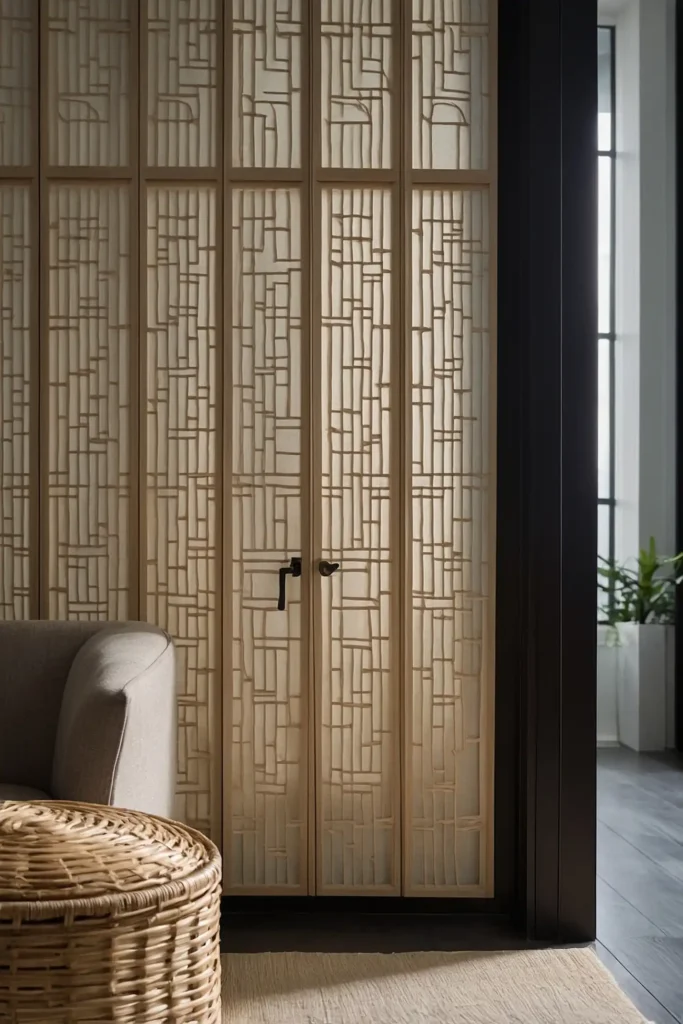
4: Rattan Door Inserts
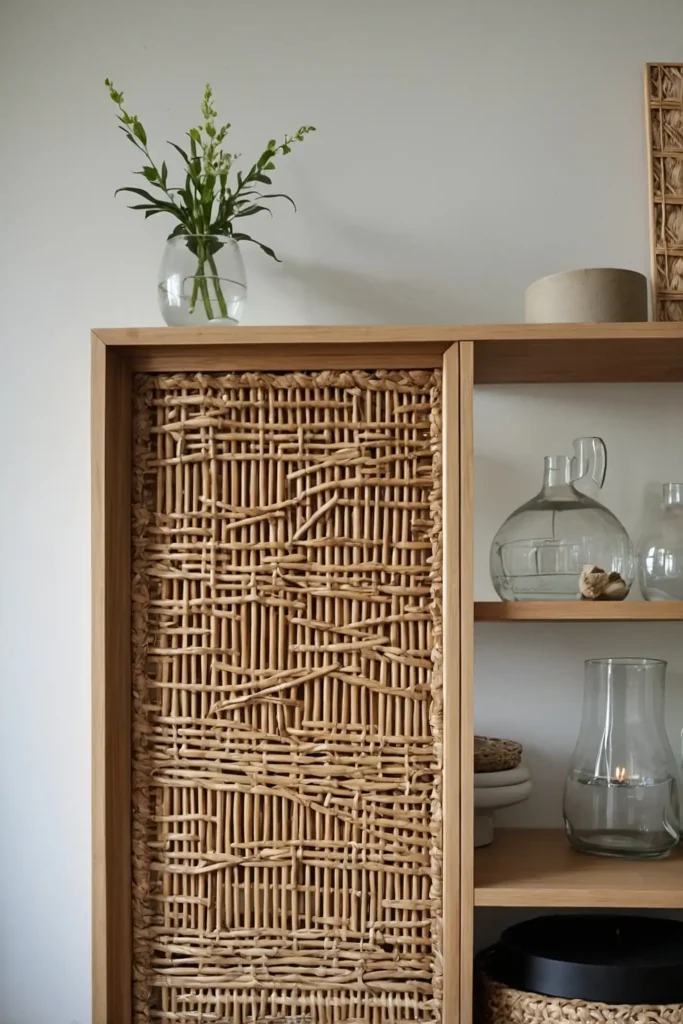
Replace solid door panels with cane webbing or rattan for a textural, on-trend update.
Cut the centers out of your BESTA doors, leaving a frame to attach the natural material.
Secure the rattan with thin trim pieces or a staple gun. This modification adds beautiful texture while maintaining the clean lines of the original BESTA design.
5: Custom Wood Overlay
Create a slat design by attaching thin strips of wood to the front of your BESTA units.
Space the slats evenly for a contemporary look that adds warmth and dimension.
Use wood glue and finishing nails to secure the slats. Stain or paint the wood in your desired finish to complement your existing décor style.
6: Fluted Door Upgrade
Add vertical fluting to your BESTA doors for architectural interest.
Attach half-round wooden dowels vertically across the door fronts with even spacing between each piece.
Paint the entire unit, including the fluting, in the same color for a cohesive, custom look.
This textural element creates beautiful shadow play as light moves across the surface.
7: Minimalist Floating Credenza
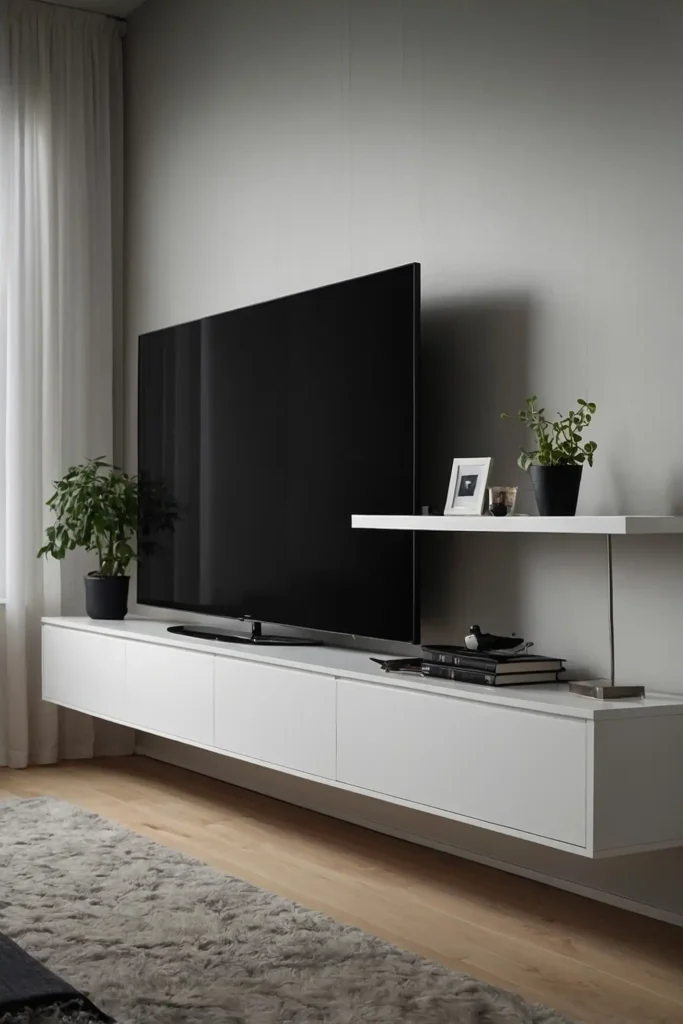
Mount BESTA cabinets to the wall without legs for a sleek, floating appearance.
Ensure proper wall anchoring to support the weight of the unit and its contents.
Install subtle LED strip lighting underneath to enhance the floating effect.
This contemporary approach maximizes floor space while creating a dramatic design statement.
8: Upholstered Bench Combo
Transform a low BESTA unit into stylish seating by adding a cushioned top.
Cut a piece of medium-density foam to size and cover with your choice of durable upholstery fabric.
Secure the cushion with heavy-duty staples underneath a wooden platform.
This dual-purpose piece provides both storage and seating in entryways or bedrooms.
9: Geometric Overlay Design
Create visual interest with a geometric pattern applied to your BESTA doors.
Use thin balsa wood or decorative trim pieces to form diamonds, hexagons, or other geometric shapes.
Paint the entire unit one color for subtle texture or use contrasting colors to make the pattern pop.
This customization adds designer flair without major construction skills.
10: Nursery Changing Station
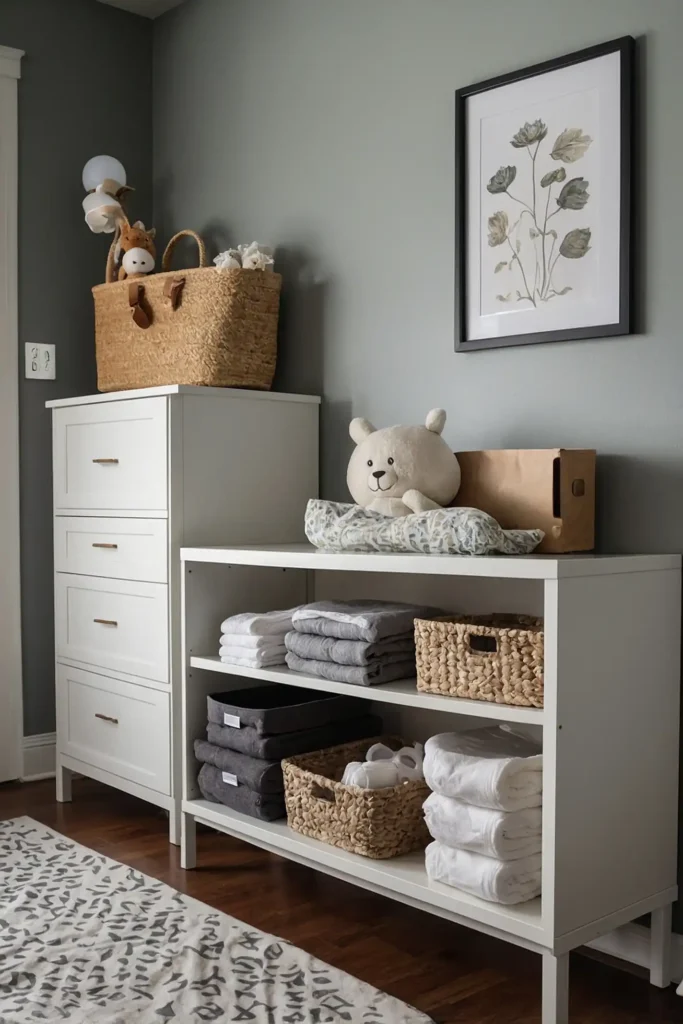
Convert a BESTA unit into a practical changing table by adding a changing pad on top and safety rails around the edges.
Store diapers, wipes, and baby clothes in the cabinets below.
Select child-safe hardware and ensure the unit is properly anchored to the wall.
This hack creates a functional nursery piece that transitions easily to regular storage as your child grows.
11: Grasscloth Wallpaper Front
Apply textural grasscloth wallpaper to your BESTA doors for natural, organic appeal.
Choose a neutral tone that complements your existing décor for timeless sophistication.
Secure the wallpaper with spray adhesive designed for furniture applications.
The natural fibers add subtle dimension and warmth to the clean-lined BESTA system.
12: Arched Door Transformation
Reshape your BESTA doors with an arched top for architectural character.
Use a jigsaw to cut the arch, then sand the edges smooth before painting or refinishing.
Add brass or leather pulls at the base of each door to complete the look.
This simple modification adds unexpected curves to the typically rectilinear BESTA design.
13: Color-Blocked Statement Piece
Create visual interest by painting different sections of your BESTA unit in complementary colors.
Try a bold front with neutral cabinet body, or alternate door colors for a playful effect.
Use high-quality furniture paint and proper primers for lasting results.
This approach allows you to incorporate trend colors without committing to an entirely bold piece.
14: Concrete Top Application
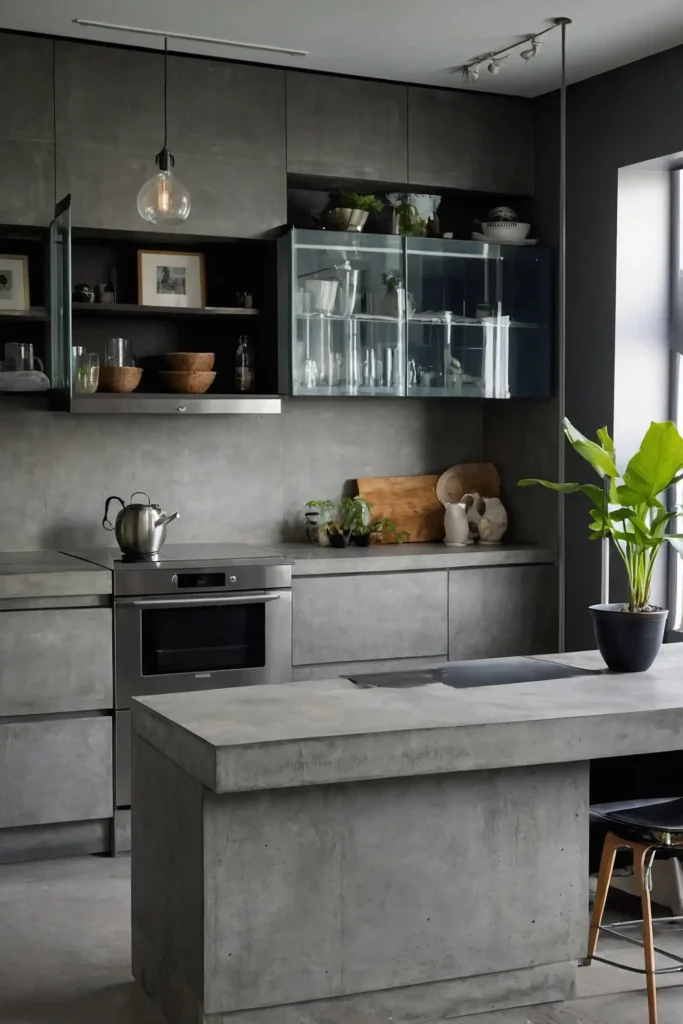
Add an industrial edge by creating a concrete overlay for your BESTA top.
Use featherweight concrete designed for countertops to minimize structural strain on the unit.
Seal thoroughly to prevent staining and moisture damage.
The contrast between sleek cabinet fronts and the raw concrete creates compelling textural interest.
15: Hidden Cat Litter Solution
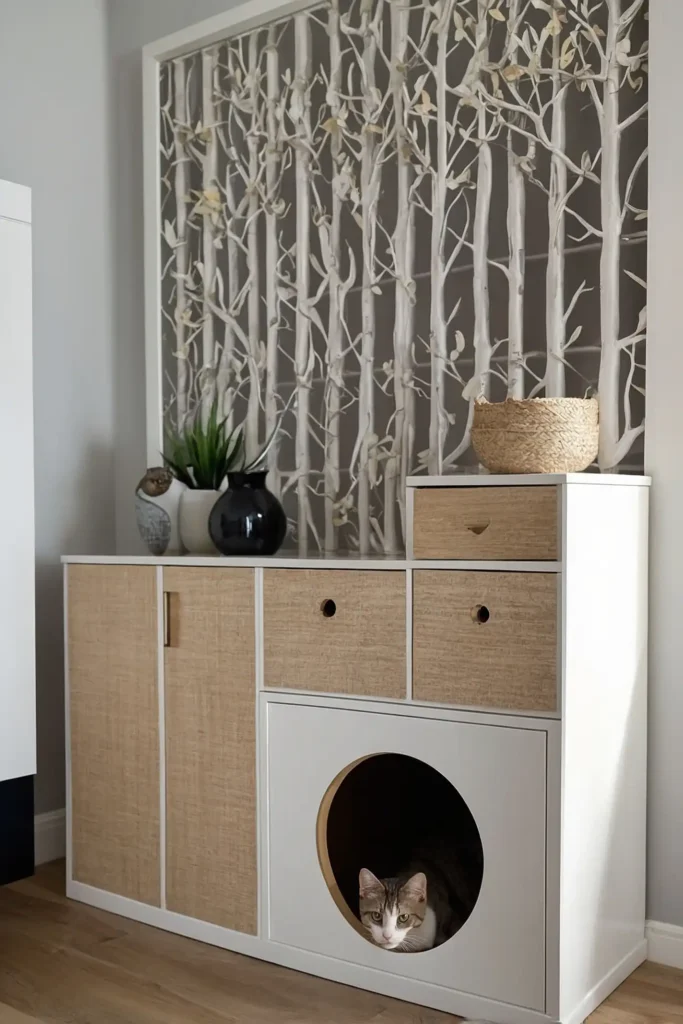
Convert a BESTA cabinet into a disguised cat litter station by cutting a cat-sized entry hole in one side.
Line the interior with protective material and add a high-quality litter box inside.
Install a pet door on the cabinet side or front for easy access.
This clever hack keeps litter boxes hidden while maintaining easy access for cleaning.
16: Home Bar Customization
Transform your BESTA into an elegant home bar by adding wine glass holders underneath, bottle storage inside, and a serving surface on top.
Install mirrored panels or glass shelves for display.
Add interior lighting to showcase your collection.
Upgrade hardware to substantial pulls that reflect your personal style for this entertainment-focused furniture piece.
17: Padded Acoustic Panels
Improve your media room’s sound quality by converting BESTA doors into acoustic panels.
Add foam padding to the door backs and cover with fabric in complementary colors.
Secure fabric with staples on the hidden edges of the doors.
This functional hack minimizes sound echo while maintaining a stylish appearance in your entertainment space.
18: Two-Tone Paint Treatment
Create designer appeal with a two-tone paint application on your BESTA unit.
Paint the frame one color and the doors a complementary shade for dimensional interest.
Choose colors from the same family for subtle sophistication or contrasting hues for bold impact.
This simple paint technique elevates the basic BESTA to custom-look cabinetry.
19: Chinoiserie-Inspired Decoupage
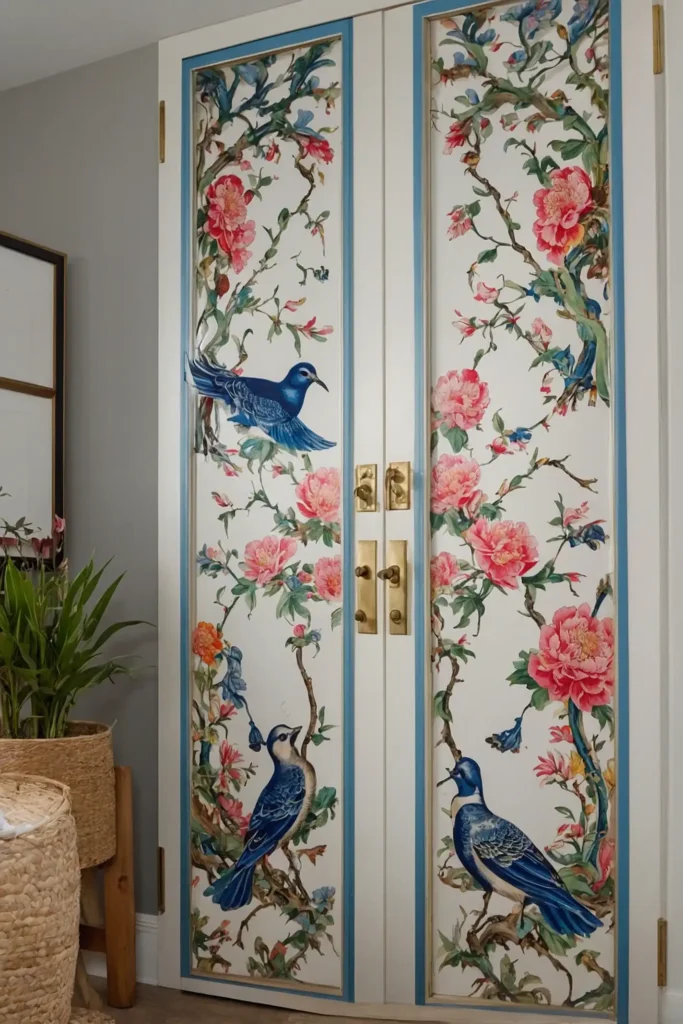
Apply chinoiserie-patterned paper to your BESTA doors using decoupage techniques.
Look for designs featuring birds, florals, or traditional Asian motifs in colorful or monochromatic styles.
Seal with multiple coats of water-based polyurethane for durability.
This decorative treatment transforms simple doors into artistic focal points within your room.
20: Playroom Organization Station
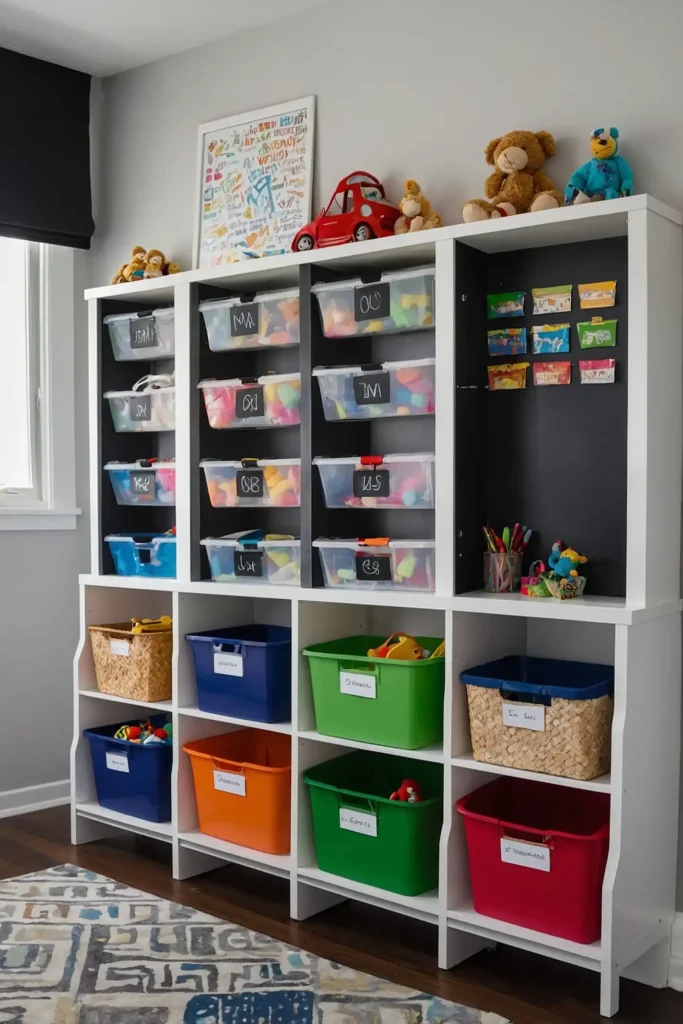
Customize a BESTA unit for kid-friendly storage by adding labeled bins, toy organizers, and safe, rounded edges.
Use chalkboard paint on doors for changeable labeling or creative drawing space.
Install at a height accessible to children while keeping dangerous items out of reach.
This practical hack creates organization that grows with your children.
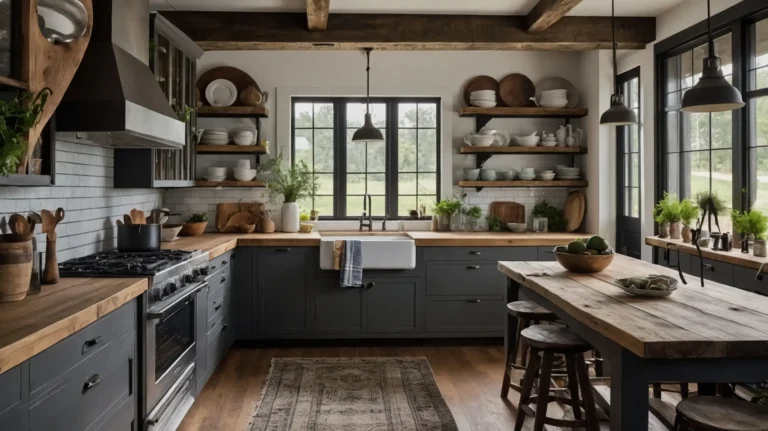
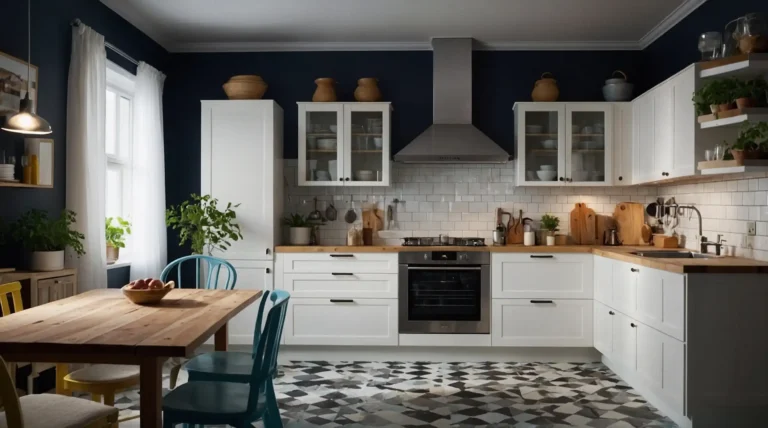
21: Kitchen Island Conversion
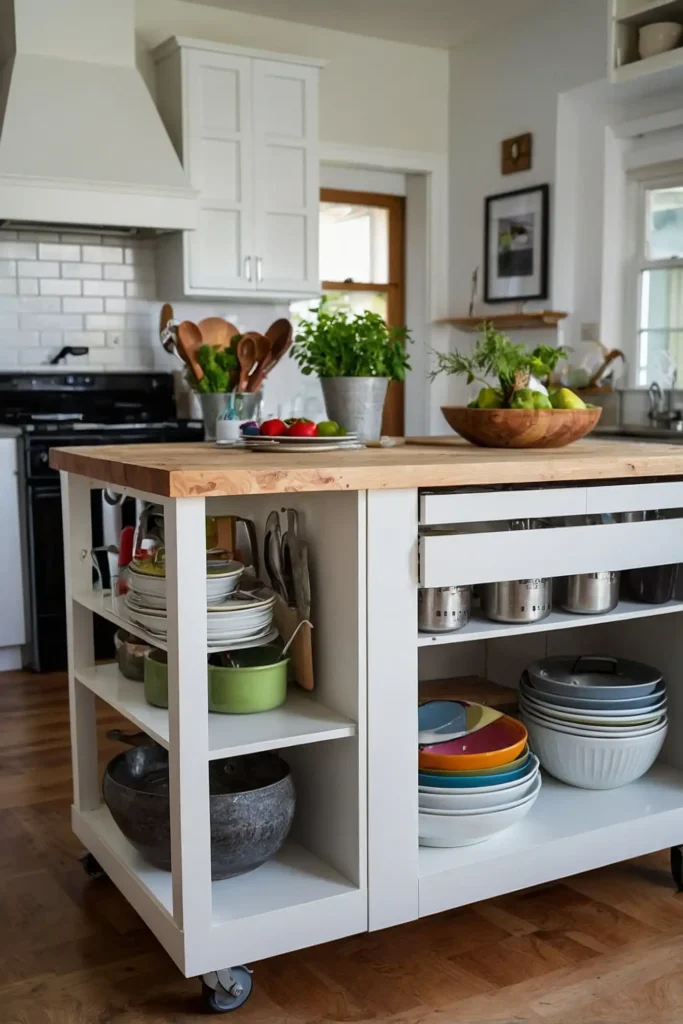
Transform multiple BESTA units into a functional kitchen island by joining them with a wooden countertop.
Add casters for mobility or a plumbing-compatible area for a small prep sink.
Create useful divisions for cookbooks, specialty appliances, or baking supplies.
This clever repurposing adds valuable workspace and storage to kitchens of any size.
22: Textured Rice Paper Doors
Apply traditional rice paper to door panels for a Japanese-inspired aesthetic.
The translucent quality creates gentle light diffusion while concealing contents stored inside.
Secure with specialized adhesive and seal with clear protective finish.
This delicate material adds unexpected organic texture to the modern BESTA framework.
23: Office Credenza With Desktop

Extend the top of your BESTA unit with a wood slab to create a functional desk/storage combination.
Select a substantial wood piece that extends 18-24 inches beyond the cabinet for comfortable seating.
Support the extension with hairpin legs or decorative brackets.
This workspace solution provides both ample storage and a dedicated work surface in compact areas.
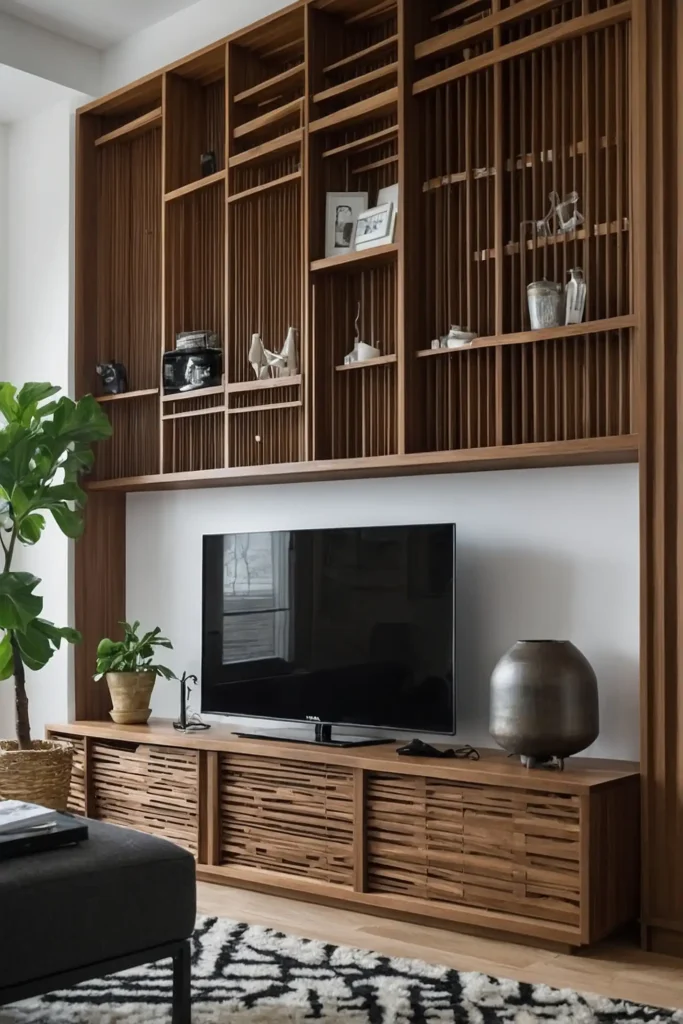
24: Ribbed Wood Slat Wrap
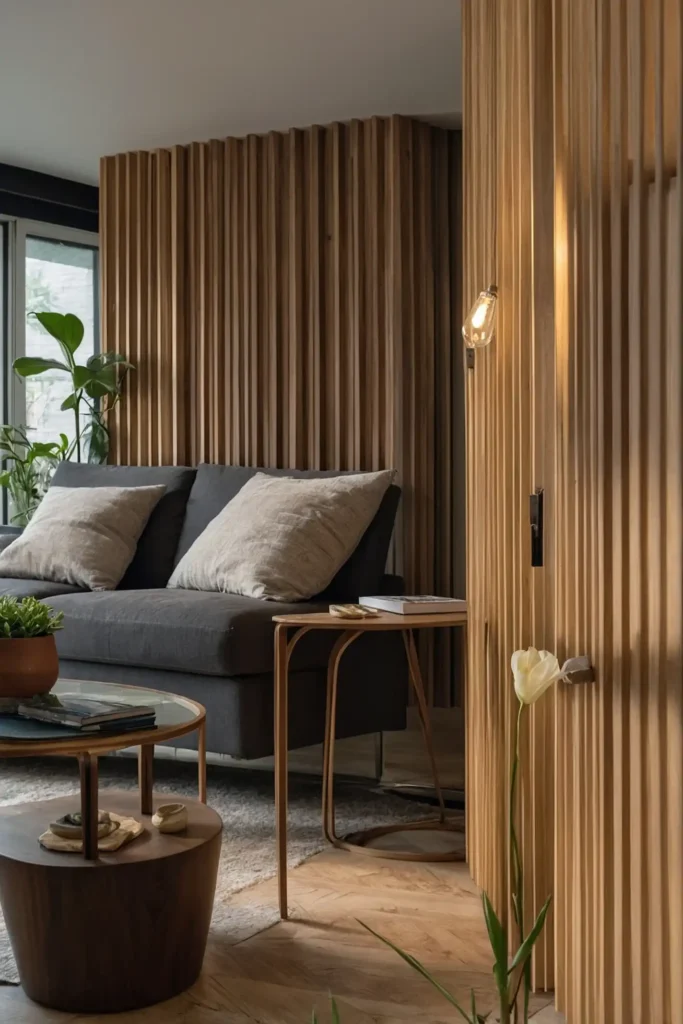
Create a three-dimensional wrap with vertical wood slats that extend around the sides of your BESTA unit.
This architectural treatment transforms the simple box into a textural sculpture.
Space the slats evenly and secure with wood glue and discrete nails.
The vertical elements add height and visual interest to the typically horizontal BESTA design.
25: Leather Strap Door Pulls
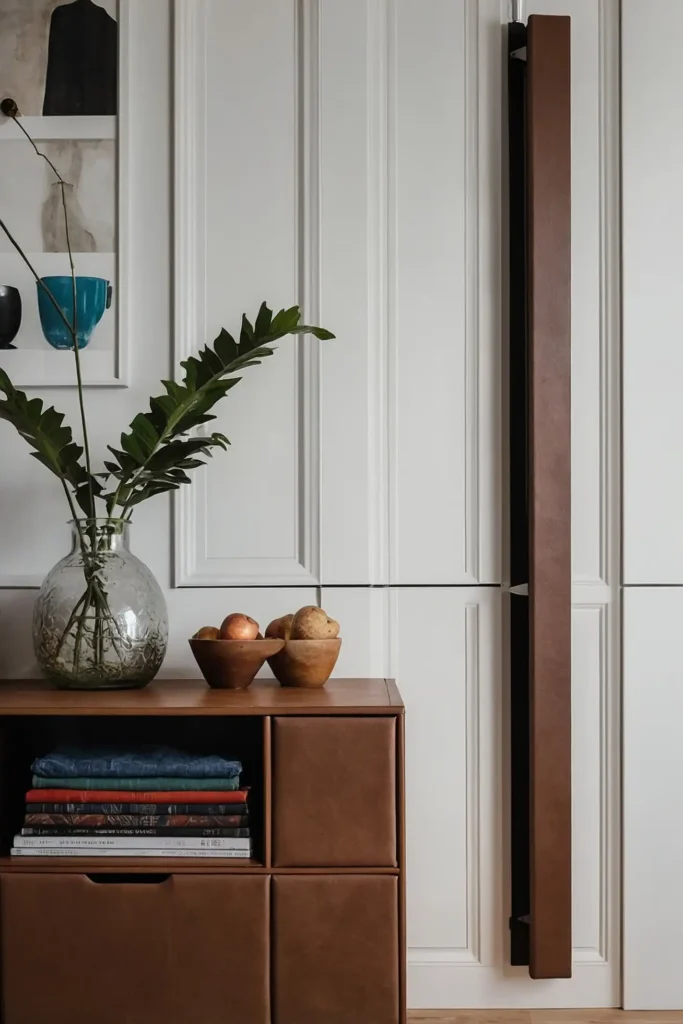
Replace standard handles with DIY leather strap pulls for organic modern appeal.
Cut strips from quality leather and secure with brass fasteners through the door front.
Choose natural leather that will develop a rich patina over time. This small detail adds handcrafted character to the mass-produced BESTA framework.
26: Antiqued Mirror Panels
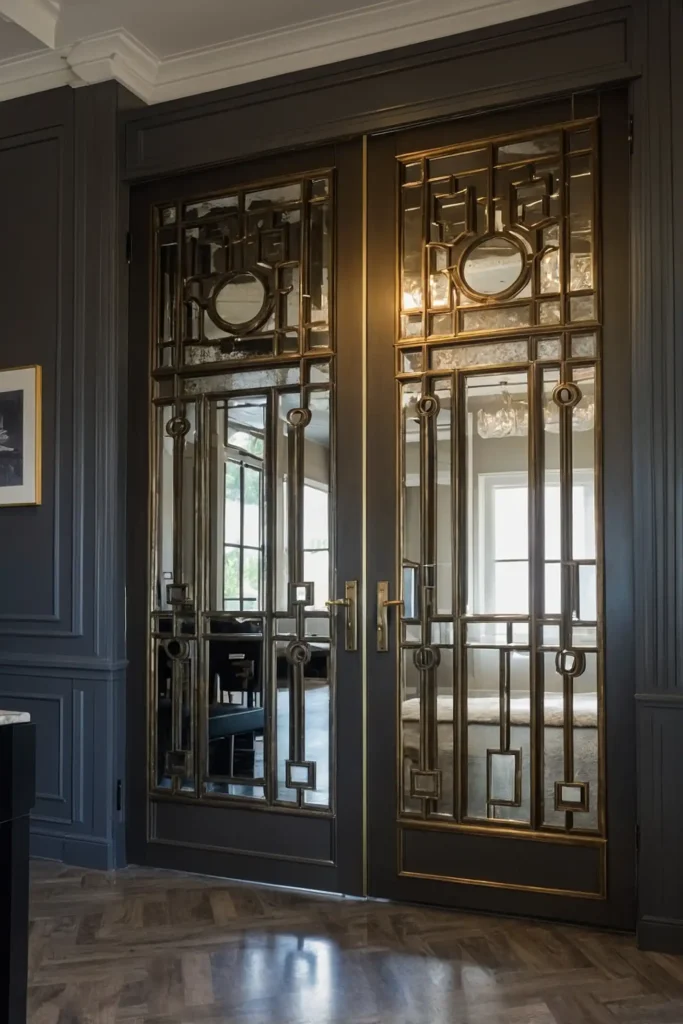
Add glamour with antiqued mirror panels applied to door fronts.
Purchase pre-antiqued mirror sheets or create your own using mirror spray paint and chemical antiquing solutions.
Cut mirror to fit door recesses or cover the entire front surface.
This reflective treatment adds depth, light, and vintage sophistication to basic BESTA units.
27: Woven Fiber Door Fronts

Replace standard doors with custom panels featuring woven sea grass, jute, or other natural fibers.
Secure woven materials to a backing board that attaches to the BESTA frame.
Finish edges with trim pieces in natural wood or painted to match your unit.
This organic element adds warmth and textural interest to the sleek BESTA design.
Conclusion
Transform your BESTA units from basic storage to designer-worthy pieces with these creative hacks.
Start with one simple modification that matches your style and skill level, then enjoy your personalized IKEA masterpiece for years to come.