Before & After: Easy Room Décor Upgrades You Can Do in a Weekend
You stare at your living room every evening, knowing it needs something but feeling overwhelmed by the thought of a major renovation.
The good news? Dramatic transformations don’t require weeks of construction or massive budgets.
These weekend-friendly upgrades deliver maximum impact with minimal time investment.
You’ll start Friday evening with a tired-looking space and finish Sunday with a room that feels completely refreshed.
Roll up your sleeves and prepare to transform your home in just two days using these proven strategies that interior designers use to create stunning before-and-after reveals.
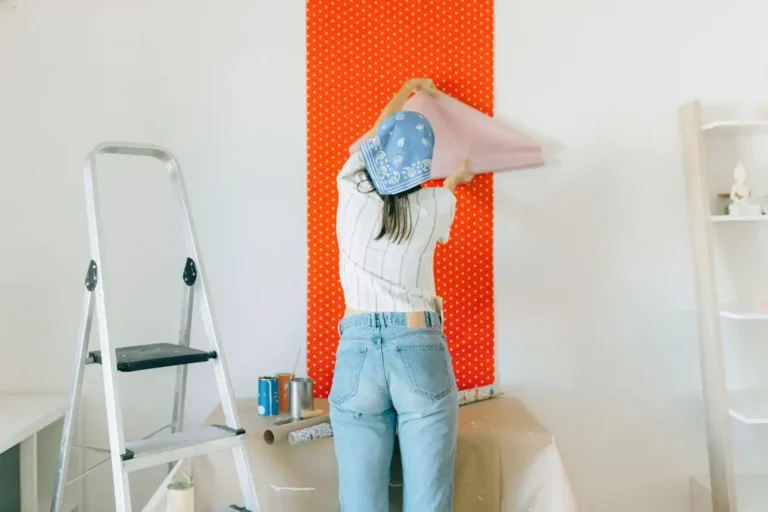
Transform Your Walls with Strategic Paint Updates
Before: Your room feels bland and lacks personality, with builder-grade white or beige walls that provide no visual interest or character.
The Weekend Project: Create a dramatic accent wall using paint, wallpaper, or removable wall decals that add instant sophistication to your space.
Choose the wall behind your bed, sofa, or dining table as your focal point. This strategic placement draws attention and anchors your furniture arrangement while creating visual depth.
Paint offers the most budget-friendly transformation option. Bold colors like deep navy, forest green, or charcoal gray create striking backdrops for artwork and furniture.
Lighter options such as soft sage, dusty pink, or warm gray add subtle interest without overwhelming smaller spaces.
Removable wallpaper provides pattern and texture without permanent commitment.
Geometric designs, botanical prints, or textured finishes transform plain walls into stunning focal points.
Most peel-and-stick options install easily and remove cleanly when you’re ready for change.
After: Your room gains instant personality and sophistication. Guests immediately notice the transformation, and you feel proud of your refreshed environment.
The accent wall creates visual depth, makes your ceiling appear higher, and provides a polished backdrop that elevates your entire space.
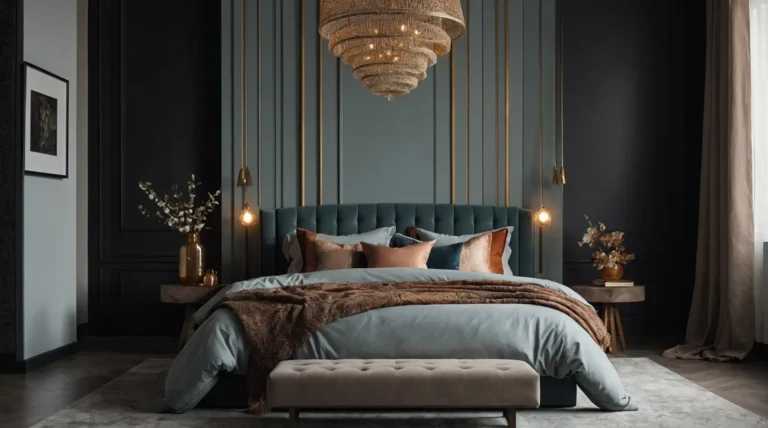
Upgrade Your Lighting for Instant Ambiance
Before: You rely on harsh overhead lighting that creates unflattering shadows and makes your room feel cold and uninviting, especially during evening hours.
The Weekend Project: Layer multiple light sources throughout your room to create warm, welcoming ambiance that transforms your space’s mood and functionality.
Start by adding table lamps in corners or on side tables to create pools of warm light.
Choose lampshades in fabric or paper materials that diffuse light softly rather than glass or metal shades that create harsh glare.
Install battery-operated LED strip lights behind your headboard, under floating shelves, or inside glass cabinets for subtle accent lighting.
These wireless options require no electrical work but add professional-looking illumination.
Replace your overhead bulbs with warm-toned LED bulbs (2700K-3000K color temperature) that create cozy atmospheres.
Install dimmer switches if possible, or choose smart bulbs that adjust brightness through phone apps.
Add floor lamps in reading areas or empty corners to balance light throughout the room. Arc floor lamps work beautifully behind sofas, while tripod or tree-style lamps fill vertical space in corners.
After: Your room feels dramatically more sophisticated and comfortable. Multiple light sources create depth and warmth, making the space feel larger and more luxurious.
You can adjust lighting for different activities and times of day, transforming your room’s mood instantly.
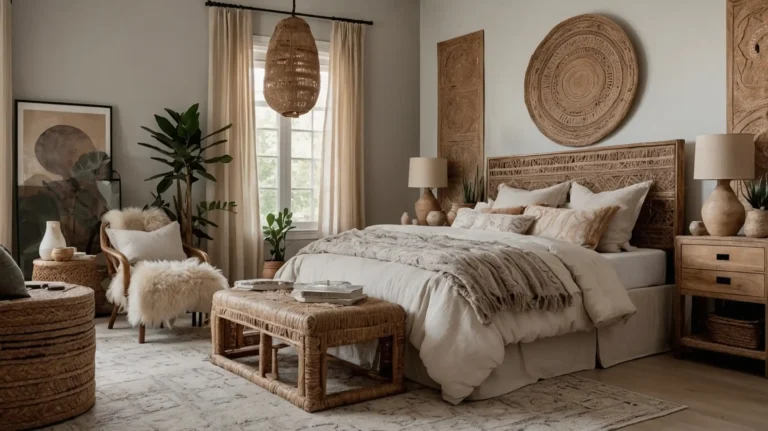
Refresh Textiles for Color and Comfort
Before: Your room features outdated or mismatched pillows, throws, and window treatments that lack cohesion and fail to reflect your current style preferences.
The Weekend Project: Update all soft furnishings with coordinated textiles that introduce new colors, patterns, and textures while maintaining budget-friendly impact.
Begin with throw pillows, which offer the biggest visual impact for the smallest investment.
Choose three different fabrics that share common colors but vary in pattern and texture. Mix geometric prints with solid colors and textured weaves for sophisticated combinations.
Replace old throw blankets with luxurious options in cashmere, faux fur, or chunky knits. Drape them casually over sofa arms or fold them neatly at the foot of beds for both style and function.
Update window treatments to frame your space beautifully. Swap out area rugs if your current one feels dated or wrong-sized.
Hang curtains higher and wider than your actual windows to create the illusion of larger openings and higher ceilings. Choose fabrics that complement your new pillow palette.
The correct rug should fit under all furniture legs in seating areas or at least the front legs of your sofa and chairs.
After: Your room feels completely refreshed and pulled together. The coordinated textiles create visual cohesion while introducing new colors and textures that reflect your personal style.
The space appears more expensive and thoughtfully designed without requiring furniture replacement.
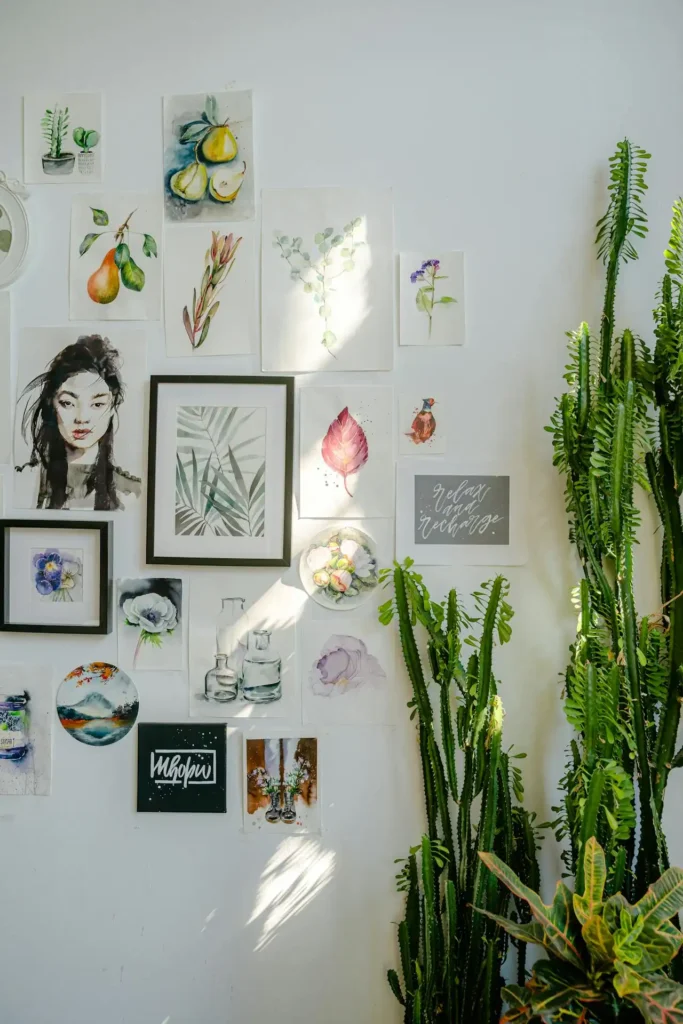
Create Gallery Walls and Focal Points
Before: Your walls display scattered artwork or family photos without intentional arrangement, creating visual clutter rather than sophisticated focal points.
The Weekend Project: Design and install a cohesive gallery wall or create other eye-catching focal points that draw attention and showcase your personality.
Plan your gallery wall layout on the floor before hanging anything. Cut paper templates matching your frame sizes and tape them to the wall to test arrangements.
This prevents unnecessary holes and ensures balanced compositions. Mix frame sizes and orientations while maintaining consistent spacing between pieces.
Two to three inches between frames creates professional-looking arrangements that feel intentional rather than cluttered.
Choose artwork, photographs, or prints that share common elements like color palette, subject matter, or framing style.
Black and white photography works beautifully together, as do botanical prints or abstract pieces in similar tones.
Consider alternative focal points if gallery walls feel overwhelming. Large mirrors create dramatic impact while reflecting light and making spaces appear larger.
Floating shelves display books, plants, and decorative objects while adding architectural interest.
Statement clocks, wall sculptures, or tapestries provide single-piece solutions that create focal points without requiring multiple coordinated elements.
After: Your room gains sophisticated focal points that reflect your personality and style.
The thoughtfully arranged artwork creates visual interest and conversation starters while making your space feel more finished and intentional.
Rearrange Furniture for Better Flow
Before: Your furniture arrangement feels awkward, blocks natural traffic patterns, or fails to encourage conversation and comfortable daily use.
The Weekend Project: Experiment with different furniture layouts that improve functionality while creating more appealing and spacious-feeling arrangements.
Pull furniture away from walls to create more intimate conversation areas and improve traffic flow.
Float your sofa in the room’s center with a console table behind it for added surface space and visual separation.
Angle chairs toward your sofa rather than placing them parallel to walls. Create multiple functional zones within larger rooms.
This arrangement encourages conversation while creating more dynamic visual compositions that feel less rigid and formal.
Define a reading nook with a comfortable chair and side table, separate from your main seating area but still visually connected through coordinated colors or styles.
Ensure adequate walking space around furniture pieces. Consider the room’s focal point when arranging seating.
Maintain at least 18 inches between seating and coffee tables, and provide clear pathways between rooms that don’t require squeezing past furniture.
Orient furniture toward fireplaces, large windows with views, or entertainment centers rather than randomly throughout the space.
After: Your room feels more spacious, functional, and welcoming.
The improved furniture arrangement encourages conversation, provides better traffic flow, and makes the space feel larger without adding or removing any pieces.
Update Hardware and Fixtures
Before: Your room features outdated cabinet handles, light fixtures, or decorative elements that date your space and detract from your overall design aesthetic.
The Weekend Project: Replace small hardware elements and fixtures that make disproportionately large visual impacts for minimal time and money investment.
Cabinet and drawer pulls transform kitchens and bathrooms instantly. Choose finishes that complement your faucets and other metal elements throughout your home.
Matte black, brushed brass, and polished chrome remain popular choices that coordinate with various design styles.
Light fixture replacements require basic electrical skills but create dramatic transformations.
Pendant lights over kitchen islands, chandeliers in dining rooms, or sconces flanking bathroom mirrors update spaces significantly.
Switch plates and outlet covers in coordinating finishes polish your room’s appearance.
White plastic covers disappear against white walls, while decorative metal options add subtle luxury touches.
Door hardware including knobs, deadbolts, and hinges should coordinate throughout your home.
Consistent finishes create cohesive design flows that feel intentional and sophisticated.
Curtain rods and window hardware updates complement your new textile choices. Choose finishes that coordinate with your other metal elements for visual consistency.
After: Your room feels more current and polished. The updated hardware creates visual consistency while eliminating dated elements that previously detracted from your space’s overall appeal.
Style Surfaces with Intentional Accessories
Before: Your surfaces display random collections of items without thoughtful arrangement, creating visual clutter rather than sophisticated styling.
The Weekend Project: Edit and restyle all surfaces using professional design principles that create beautiful, functional displays.
Apply the rule of three when grouping accessories. Combine objects of varying heights, textures, and shapes in triangular arrangements that feel balanced and intentional.
Edit ruthlessly by removing items that don’t serve functional or aesthetic purposes. Clear surfaces feel more sophisticated than cluttered ones, so embrace negative space as part of your design.
Layer different textures and materials within each grouping. Combine smooth ceramics with rough wood, shiny metals with matte finishes, or soft textiles with hard surfaces for visual interest.
Include living elements like plants or fresh flowers that add natural beauty and connect indoor spaces to the outdoors.
Choose containers that complement your room’s color scheme and style. Create functional beauty by displaying items you use regularly in attractive ways.
Wooden cutting boards, ceramic canisters, or woven baskets serve daily needs while enhancing your room’s aesthetics.
Books provide excellent styling elements while reflecting your interests.
Stack coffee table books horizontally, then top with small decorative objects for layered, sophisticated arrangements.
After: Your room feels more organized, sophisticated, and personally meaningful.
The thoughtfully styled surfaces create visual interest without clutter while reflecting your personality and providing functional storage solutions.
Quick DIY Projects for Custom Touches
Before: Your room lacks unique elements that reflect your personality and feels similar to countless other spaces with mass-produced furnishings and accessories.
The Weekend Project: Complete simple DIY projects that add custom touches and personal character without requiring advanced crafting skills or expensive tools.
Frame fabric or wallpaper samples to create affordable artwork that coordinates perfectly with your room’s color scheme.
Choose patterns and textures that complement your existing décor while adding visual interest to blank walls.
Paint furniture pieces to update their appearance and create custom finishes.
Sand lightly, apply primer, then use chalk paint or furniture paint for professional-looking results that don’t require stripping or extensive preparation.
Create custom pillow covers using fabric that coordinates with your design scheme.
No-sew options using fabric glue or iron-on adhesive provide professional-looking results without sewing machine requirements.
Build simple floating shelves using brackets and wood boards from home improvement stores.
These provide additional storage and display space while adding architectural interest to blank walls.
Design custom artwork using canvas, paint, and stencils to create pieces that perfectly match your color scheme and personal style.
Abstract designs, geometric patterns, or simple botanical silhouettes work beautifully for beginners.
After: Your room gains unique, personal touches that distinguish it from catalog showrooms.
The custom elements reflect your creativity and style while providing functional improvements that enhance your daily enjoyment of the space.
Conclusion
Transform any room dramatically using these weekend-friendly upgrades that deliver professional results without extensive time commitments or major investments.